

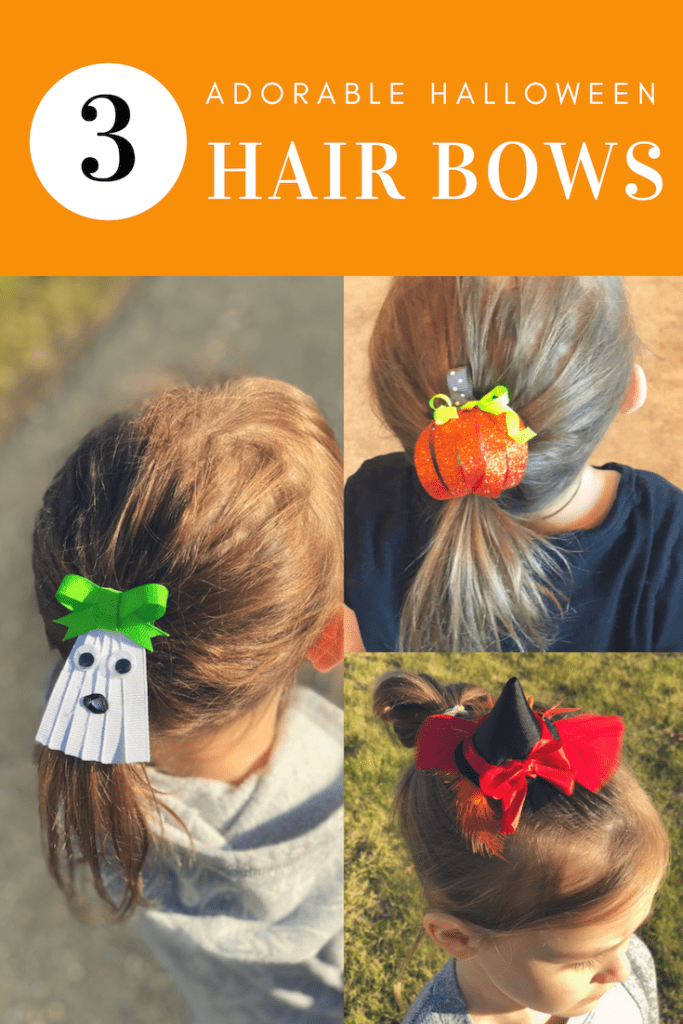
How To Make Cute Halloween Hair Bows

Make these Halloween Hair Bows for the girls in your life. They get so much beloved every time my daughters wear them. Nosotros've been asked how to make them so many times, information technology was finally time to create a tutorial.
Halloween Hair Bows
If you are just learning to make your own hair bows, we have a swell starter tutorial for the iii nearly popular styles of hair bows hither.
Non only are these SO MUCH FUN! Simply they are also really easy to make. Then take hold of your ribbon and your glue gun and let'due south make some fun Halloween Hair Bows!
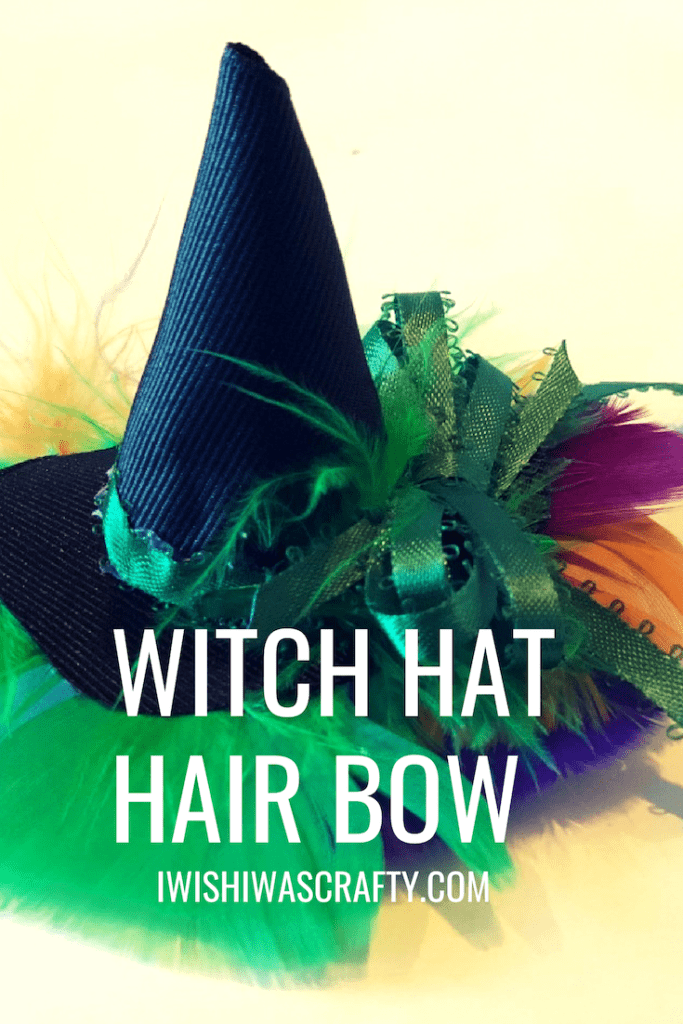
How to Make a Witch Lid Bow
These witch hats are the perfect hair accessory for the little spell caster in your life. They can hands be customized to coordinate with a special Halloween outfit or inspired past your favorite Halloween movie. My muse for the witch hats seen in this tutorial came from the lovely Sanderson Sisters from the Halloween classic Hocus Pocus. Since my daughters and I are going as the three witches for Halloween this year, the theme could not accept been more appropriate.
Supplies:
- Wide, black ribbon – at least 2 ¼" wide
- ⅜" Wide ribbon/trim/ric-rac for embellishment
- Assorted colors of feathers (optional)
- Extra embellishments (optional)
- Glue gun/glue sticks
- Pilus clip of choice to attach the bow to
- Felt circle for securing the bow to the clip (This is optional. Extra ribbon for securing will work only fine as well.)
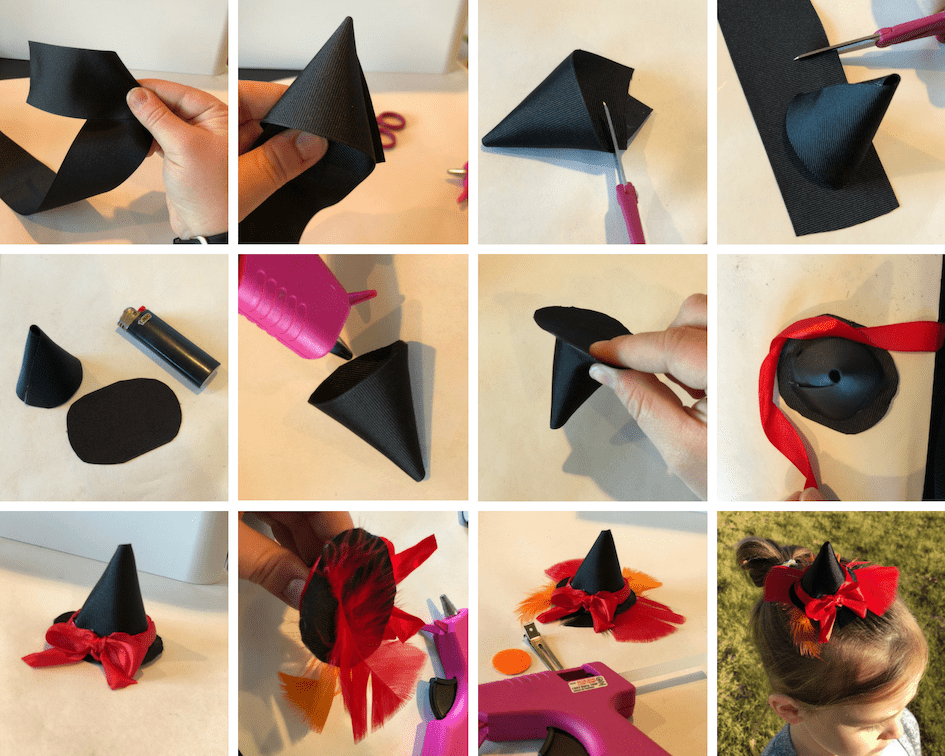
Directions:
- First, we will prepare the cone part of the hat. Holding the end of the ribbon, start to roll information technology inward until a point starts to emerge on the side. Keep the point tight as you roll information technology into a triangle shape and glue the edges to secure it. Cut the piece off from your spool of ribbon and cut anything below your triangle shape leaving you with a clean cone.
- Cut a rectangle from your spool of wide, black ribbon. Your rectangle needs to be wider than your cone. Once you have your rectangle, round the edges to create the brim of your hat. Use a lighter to singe the edges you have cut to proceed them from fraying.
- Time to warm up the gum gun to attach your cone and brim. This can be a fleck catchy to get right the first time so delight don't let yourself get discouraged if it's not perfect. A petty disproportion can sometimes make these bows look even better! You will want to employ a heavy layer of hot glue to the inside, base of the cone and apace place on top of your rounded brim. Printing and agree the base to the brim all the way around the cone for a secure hold. The seam between the two doesn't need to be perfect, especially if y'all plan to embrace it with a piece of ribbon and/or an embellishment.
- Using your ribbon (or trim/ric-rac/etc) of selection, wrap and glue information technology to the seam where you glued your cone to your brim. In that location is no right or wrong manner to do this. I encourage yous to make information technology your ain. I decided to just glue the ribbon to the base of operations on the kickoff couple and on the 3rd one, I twisted the ribbon as I glued it downwards. I love the dimensional outcome information technology created.
- Fourth dimension to add the feathers (This step is completely optional). Hot mucilage as many as you'd like to the bottom of the brim. How far out yous would like your feathers exposed is besides a personal choice. You can encompass the glued feathers with an extra slice of ribbon for a more than polished look.
- To attach the hair clip to the bottom of my witch hats, I decided to use felt circles but if you do non have these, then a piece of ribbon will do simply likewise. Once you hot gum your hair clip to your hat you can add whatever finishing touches or embellishments. I love using pocket-size bows or crafted buttons.
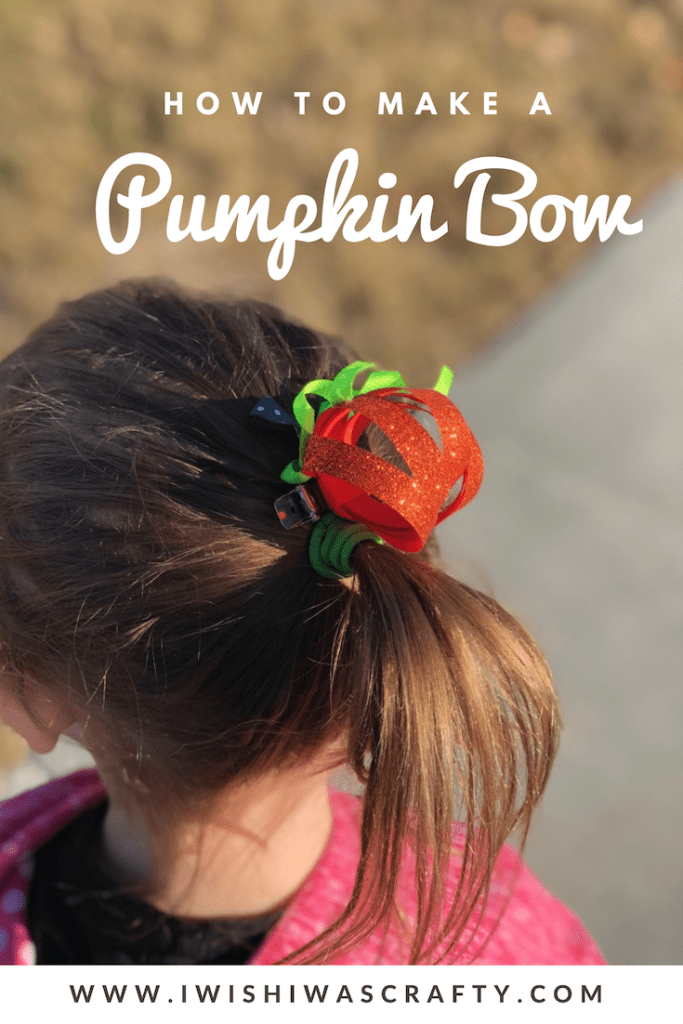
How to Make A Pumpkin Sculpture Bow
Bippity Boppity, how cute are these pumpkin bows? Sculpture bows make a bang-up add-on to an upstyle hair-do, such as a ponytail or bun. While some sculpture bows can prove to exist challenging, this one is quite uncomplicated to construct. Before we go started on the pumpkin, we will need to do some preparations for our "vines" to get them curly.
You will need:
Wooden dowels (you lot tin get them at the craft shop or dwelling improvement store)
Dark-green and/or brown grosgrain ribbon
Metal clips or wood clothespin
An oven
Wrap your grosgrain ribbon tightly around the wooden dowels. Secure the ends with your clips. Line them upwards on a foil covered blistering sheet and bake at a low temperature (200-250 degrees) for at to the lowest degree 30 minutes. Allow the ribbon to cool completely before sliding information technology off of the dowels. Now we are ready to construct our pumpkin.
Supplies for the Pumpkin Bow:
- Orange ribbon- ⅜" wide grosgrain works perfectly
- Glue gun/gum
- Embellishments (optional)
- Hair clip
- Spiraled ribbon for vines and stem

Directions:
- Cut half dozen strips of your orangish ribbon. Glue the first strip into a loop. Mucilage the finish of a 2nd strip to the spot where y'all joined your ends for your loop. Be sure to glue it at a slight angle so that your loops are side past side. Repeat the procedure for all of your strips and then that they are all secured at the same spot, but they sit side-by-side at the front of your pumpkin.
- Cut 2 actress pieces of orange ribbon and run ane through the emerging pumpkin sculpture, covering where your loops are secured. Identify the other strip on the exterior of the pumpkin, also at the backside, creating a cross shape between the two strips. The strip going through the pumpkin will be wrapped effectually the other and glued in place, cutting off any excess equally you secure it. The other strip of ribbon will be used to attach the hair prune to the bow.
- Suit the spiraled ribbon how you'd like on the tiptop of the pumpkin. Yous may want to add a couple dabs of glue to the loops to secure the vines down the front or sides of the pumpkin (this step is completely optional and up to your preference). Y'all also have the pick to add together a chocolate-brown stem on pinnacle of your pumpkin or perhaps a spider embellishment to the side.
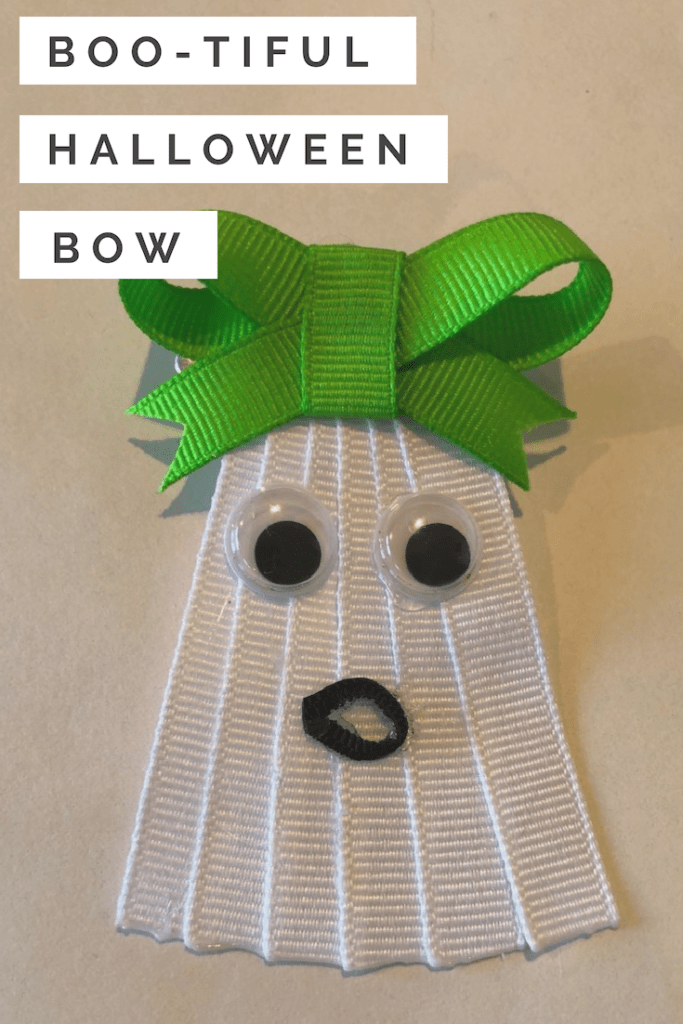
Sweet-or-Chilling Ghost Bow
You can spook these ghosts up or sweeten them with a grin, but either style they are going to be a precious addition to your Halloween bow stash.
Supplies Needed:
- White ribbon- ⅜" wide grosgrain recommended only other widths will piece of work
- Embellishment ribbon for small pinnacle bow (optional)
- Googly eyes
- Scrap of ribbon (or ric-rac) for mouth (also optional)
- Hair clip of selection
- Felt circle for attaching your hair clip (optional)
- Glue gun/glue sticks
Directions:
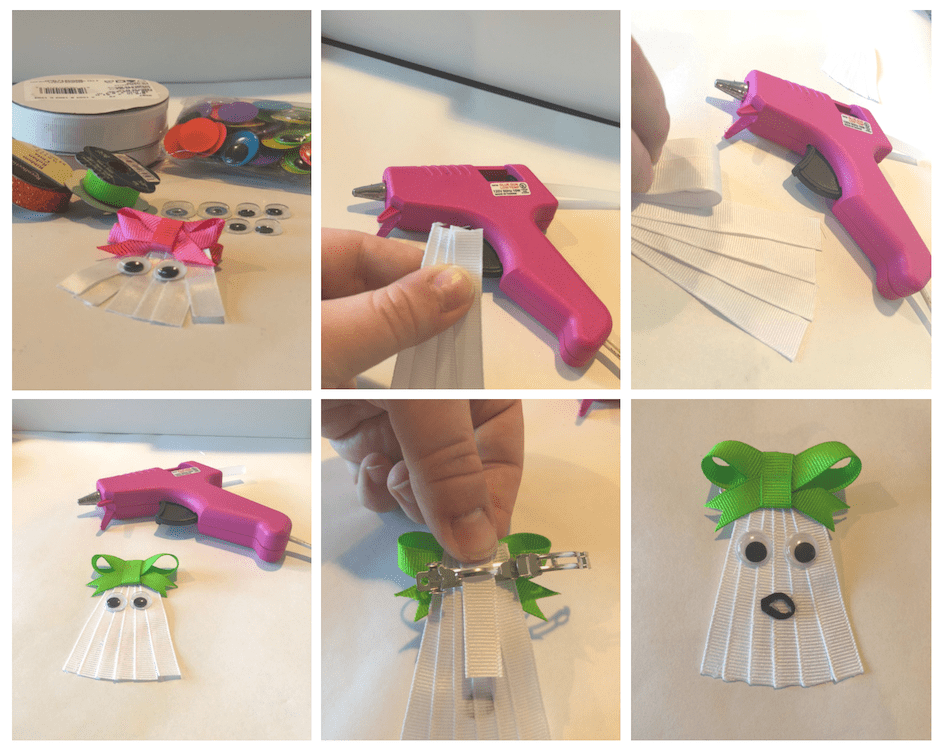
- Cut vi- 2" to 4" strips of your white ribbon. I similar to start with 4" ribbons and that style I can take a little off the bottom if I feel it'south as well long. Glue your strips side-past-side by applying a dab of mucilage to the top edges and fanning them out. Use small dabs of gum on the bottom edges to secure equally well.
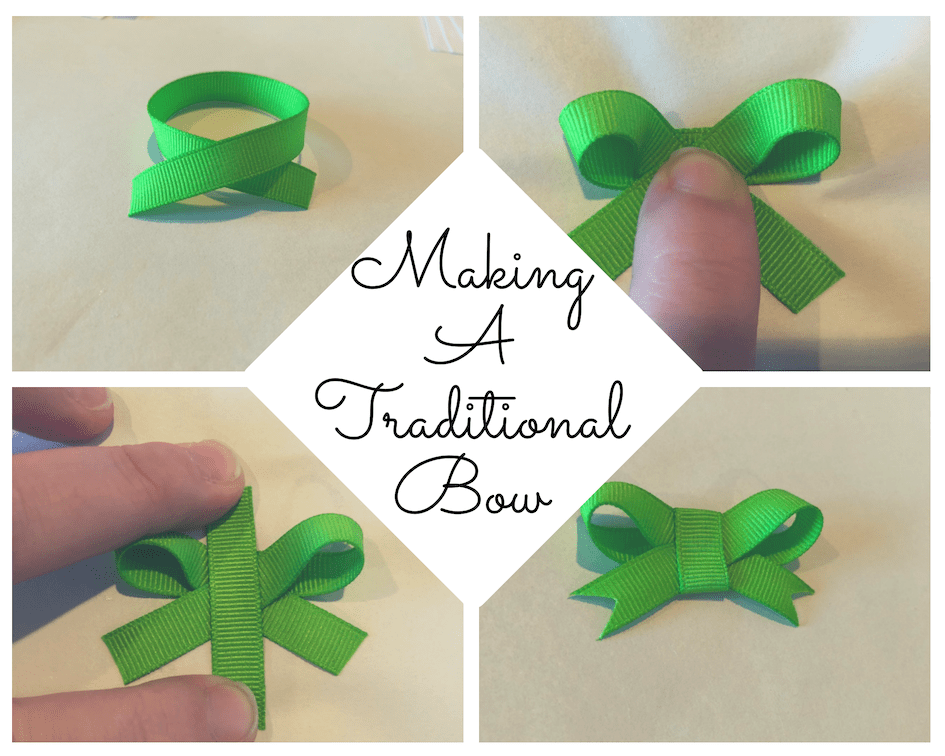
- Make a elementary, pocket-size bow for the top of your ghost. There are several ways you can exercise this. I opted for a modest traditional bow. Cross your ribbon sides until yous're happy with the size of your loops and sinch the middle. You can cutting your tails to your desired length and cover the center of the bow with the same or a analogous ribbon. Mucilage your bow to the top of your ghost.
- Now information technology's time to requite your ghost some googly eyes. You can also choose to add a little mouth with red ric-rac or employ a sliver of black ribbon to brand an "o" mouth.
- Now y'all tin attach your ghost to your hair clip. You tin hot mucilage the clip and use a felt circle or piece of ribbon to secure it.
Don't forget Thanksgiving is coming also! Check out this adorable Turkey Hair Bow Tutorial!
Looking for more Halloween Recipes and Crafts?
- Paper Bat Bookmark
- Halloween Puppets for Kids
- Pumpkin Cheesecake Brownies <—- gotta have snacks!
- Halloween Hand Pies
- Keeping Kids Prophylactic for Halloween
- DIY Chalkboard Signs for Halloween
- How to Make Fabric Pumpkins the Easy Mode
Reader Interactions

How To Make Cute Halloween Hair Bows,
Source: https://www.mynourishedhome.com/halloween-hair-bows/
Posted by: armstrongwitim1954.blogspot.com
0 Response to "How To Make Cute Halloween Hair Bows"
Post a Comment